In this article, I will show you the technique to create grain spawn. In the first part of this series, we looked at some reasons you might want to start growing edible mushrooms at home. If you haven’t read that article, you can read it here. In the second article, we showed you how to make and inoculate agar cups for growing live edible mushroom mycelium.
Grain spawn is used to inoculate a substrate so you can grow and fruit edible mushrooms. We’ll use the grain spawn we are creating to layer into our substrate to complete the mushroom grow cycle and harvest edible mushrooms.
Easy Method
In our initial article, we talked about the easy method for growing edible mushrooms at home. Growing edible mushrooms at home without a grow kit involves multiple steps and requires both a knowledge of sterile techniques and a pressure cooker for sterilization. If you aren’t comfortable with these, then order a ready-to-grow kit.
Preparing Grain Spawn
After a couple of weeks, the agar cups we created in the last step should be fully colonized and ready to transfer. Grain spawn is a necessary step to help your mycelium get a head start on any possible contaminants as we go into growing and fruiting mushrooms. Once again, this step requires you to sterilize your grain in a pressure canner, or you can purchase already sterilized grain spawn.
The jars are pretty expensive for a larger operation but might help you when you are just beginning your journey to grow mushrooms at home. However, you can make your own from wild bird seed. In fact, there are many resources online that show you how to make it using birdseed. Another great option is to use whole rye berries. Many people swear by them and you can usually find them at grain and feed stores, or online.
In keeping with my attempts to keep this all low-tech, I purchased a bag of wild bird seed to use for creating my spawn.
Here is How I Create Grain Spawn:
- Buy a bag of wild bird seed that contains mostly rye, millet, and other small seeds.
- Using a quart jar, measure out about half of the amount of birdseed you need to fill all the jars you plan to use. Remember, the seeds will swell in size when you hydrate them. They need to be hydrated because mushrooms need moisture to grow.
- Place the birdseed in a container and rinse repeatedly until the water remains clear when you refill the container. You also want to use a small strainer or spoon to remove anything that floats, such as sunflower seeds, sticks, etc. Put the sunflower seeds outside for the wildlife to enjoy.
- Place the bird seed in a container you can heat on the stove. Cover the birdseed with filtered water and soak for 12-24 hours. Don’t soak the seeds too long or they will fall apart into a mess in the next step. I found that soaking overnight will hydrate the seeds without making them mushy.
- After soaking you want to place the seeds on the stove and slowly bring them to a slow boil. Stir constantly to prevent burning the seeds. After 5 minutes remove the seeds from heat, drain them, and spoon them into jars for sterilization. Use canning jars that are made for sterilization through the canning process.
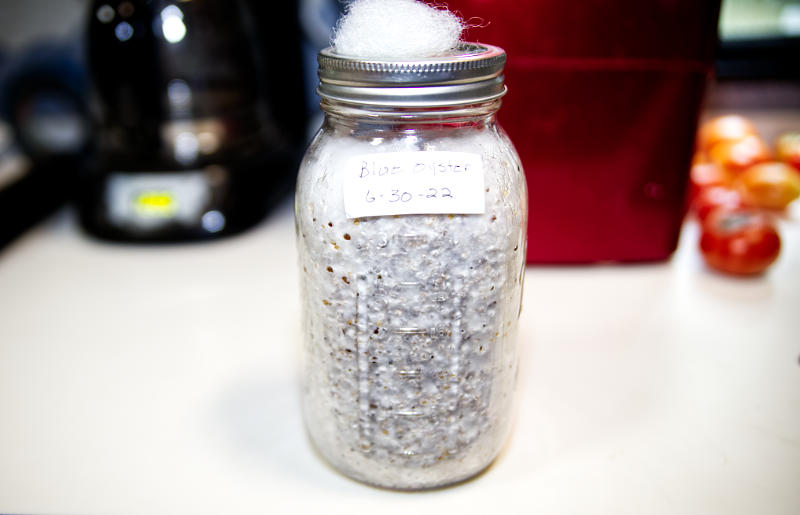
- You can use the jars like they are. Just place a lid on them and finger-tighten the lid so that gas can escape as you sterilize the grain spawn. You can also purchase lids that are pre-made and contain a vent and self-healing injection port. Or, you can do what I did and make your own modified lids. To make the lids drill 2 holes, one of 1/2″ and one of 1/4″ on opposite sides of the lid. Use fiberfill and make a filter by placing it in the 1/2″ hole. Use high-temperature RTV silicone over the 1/4″ hole to make a self-healing injection port. This can be used to inject liquid culture directly from the syringe into your grain spawn without the agar step, which some people may find easier to do.
- Sterilize the grain spawn jars at 15 psi for 60 minutes. Let the jars cool to room temperature overnight before you inoculate them. If the grain temperature is too hot it will kill your precious mycelium.
- Now that the grain spawn is sterilized the jars can be inoculated inside a still air box either directly from a culture syringe, or by using an Exacto knife to cut small pieces of mycelium and agar and place them inside the grain jars.
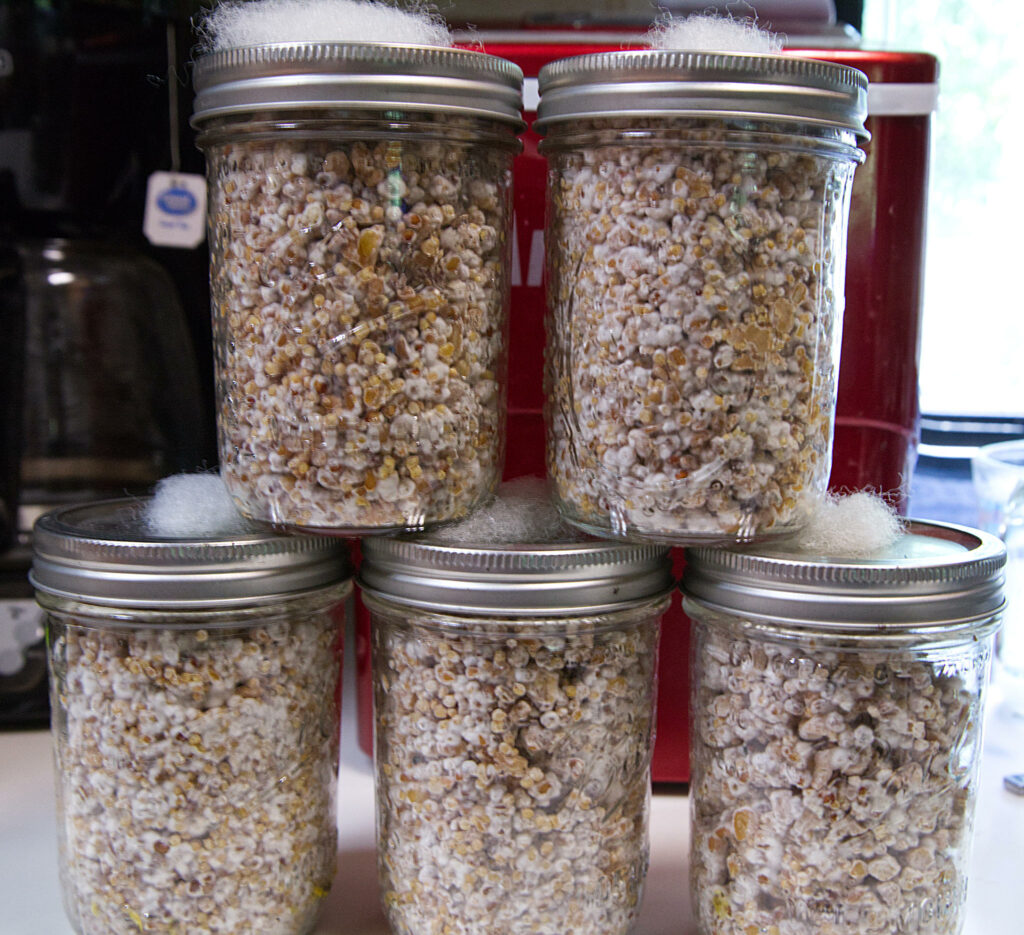
- Mix the grain by rolling the jars until you get the agar with mycelium buried in the grain. Giving the mycelium contact with as many grains as possible will speed up the process. When the jars become around 30% covered with mycelium, shake the jars and break up the grain. This will also speed up the process.
- The mycelium will grow on the grain in a couple of weeks and you will have healthy grain spawn to inoculate the substrate you will grow mushrooms on in the next step.
- You want to always keep an eye out for contamination. Molds, bacteria, or other fungi can contaminate your grain spawn if your technique doesn’t give you a sterile environment for your grain spawn. If you spot contamination in your spawn then your best, and really the only option, is to discard the contaminated grain. Discard the grain outdoors to prevent the spores from the contamination from spreading in your grow area.
Now that you know the process for growing grain spawn you are almost to the point where you can grow edible mushrooms at home. In the next article, we’ll talk about substrates and why the right one is important for the type of mushrooms you want to grow. Choose the wrong substrate and all your hard work up to this point will be wasted.
Be sure and check out all the informative articles on our Natural Living Blog.
FAQs:
Q: What is the best grain for mushroom spawn?
A: The best grain for mushroom spawn depends on the species of mushroom being grown. Common grains used for spawn include rye, wheat, and millet.
Q: How do you make grain spawn for mushrooms?
A: To make spawn, the chosen grain is first sterilized and then inoculated with mushroom spores or a piece of mycelium. The inoculated grain is then allowed to incubate until fully colonized with mycelium.
Q: Can you use grain spawn for any mushroom?
A: While grain spawn can be used for many different mushroom species, some may prefer or require a different type of substrate for optimal growth.
Q: What is the best grain spawn for mycelium?
A: The best grain for mycelium depends on the species of mushroom being grown. However, rye and wheat are commonly used and considered to be good choices for most species.
Q: What is the best grain for cubensis?
A: For Cubensis mushrooms, rye grain is a popular choice for spawn. Note that growing Cubensis mushrooms is illegal in the US.
Q: What is the easiest grain to use for mushroom spawn?
A: Brown rice flour is a relatively easy and inexpensive grain to use for mushroom spawn. However, it may not be the best choice for all mushroom species.
Q: What is a good substitute for grain spawn?
A: If it is not available or desirable, other options include using sawdust, straw, or cardboard as a substrate for mushroom growth.
Q: Is mycelium cheap to produce?
A: Mycelium can be relatively inexpensive to produce, depending on the species of mushroom being grown and the materials used for the substrate and spawn.
Q: What is the best ratio for grain spawn to the substrate?
A: The best ratio depends on the species of mushroom being grown and the specific substrate being used. A general rule of thumb is to use approximately 1 part spawn to 4-5 parts substrate.