Are you tired of always being in a pickle when it comes to growing your own veggies? Well, fear not, because today we’re diving into the wonderful world of growing okra! Whether you’re an aspiring green thumb or a seasoned gardener looking to spice up your harvest, this article has got you covered. From tips on selecting the perfect okra variety to nurturing those tender seedlings, we’ll unveil the secrets to cultivating your very own delicious and nutritious okra bounty. Let’s get ready to dig in!
What is Okra?
Okra, scientifically known as Abelmoschus esculentus, is a warm-season vegetable that belongs to the mallow family (Malvaceae). It is also commonly referred to as “lady’s finger” due to its elongated shape and tapered ends. Native to Africa, okra is now widely cultivated and enjoyed around the world for its unique flavor, versatility in cooking, and numerous health benefits.
The okra plant is characterized by its tall stalks, reaching heights of up to 6 feet (1.8 meters). It features vibrant green leaves with a distinctive heart-shaped or palmate shape. The plant also produces attractive yellow flowers with dark centers, adding visual appeal to any garden or landscape.
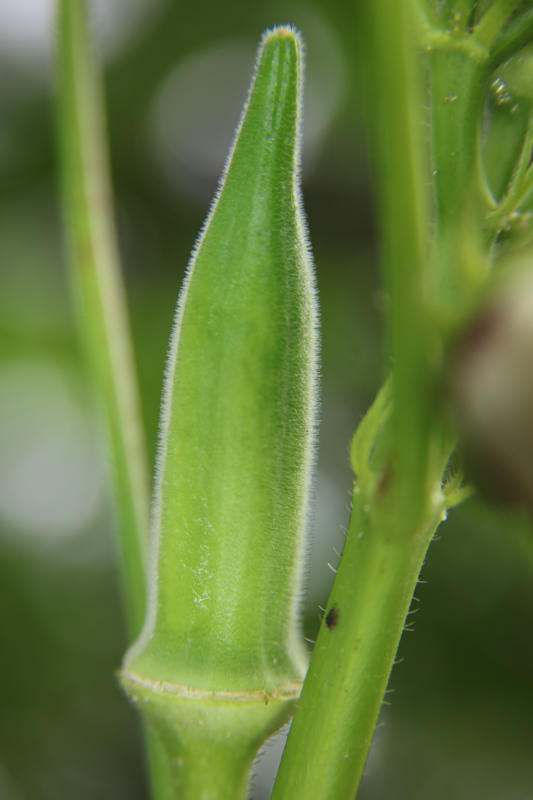
The star of the show, however, is the okra pod. These pods are cylindrical in shape, ranging from 2 to 8 inches (5 to 20 centimeters) in length, and can vary in color from light green to a deeper shade of green. Each pod is filled with small, edible seeds encased in a mucilaginous substance that gives okra its characteristic “slimy” texture when cooked.
One of the remarkable aspects of okra is its culinary versatility. It can be prepared in a variety of ways, including frying, boiling, grilling, stewing, and pickling. Okra is often used in traditional dishes from various cuisines, such as gumbo in Southern cuisine, bhindi masala in Indian cuisine, and bamya in Middle Eastern cuisine.
Benefits of Growing Okra
Okra is a nutrient-dense vegetable that can contribute to a healthy diet. It is low in calories and a good source of dietary fiber, which aids in digestion and promotes satiety. Okra also contains essential vitamins and minerals, including vitamin C, folate, and potassium, which support overall well-being.
Beyond its nutritional value, growing okra can be economically advantageous. Purchasing okra from the grocery store can be costly, especially during peak seasons. By cultivating your own okra, you can save money on purchasing this vegetable and enjoy a bountiful harvest throughout the growing season. It offers a cost-effective way to incorporate fresh, homegrown produce into your meals.
Furthermore, okra is a resilient and hardy plant, making it suitable for various growing conditions. It thrives in warm climates and can tolerate high temperatures and drought. This adaptability makes it a suitable choice for gardeners in regions with hot summers or limited water resources. Okra plants also have good resistance to pests and diseases, minimizing the need for extensive pesticide use or maintenance.
Another advantage of growing okra is its versatility in the kitchen. Okra can be prepared in numerous ways, allowing for culinary creativity and variety. Whether you prefer it fried, stewed, grilled, or pickled, okra lends itself well to a range of dishes and cuisines. Its unique texture and mild flavor make it a versatile ingredient that can add depth and complexity to soups, stews, curries, and more.
Furthermore, okra can be a fun and educational vegetable to grow, particularly for children. Its rapid growth and large, vibrant flowers can capture the curiosity and attention of young gardeners. Involving children in the process of growing okra can teach them valuable lessons about plant life cycles, responsibility, and the rewards of nurturing a living organism.
Finally, cultivating okra can be a rewarding experience for gardeners of all skill levels. Whether you’re a beginner or a seasoned gardener, okra is relatively easy to grow and maintain. It can be grown from seeds, which are readily available, and with proper care, you can enjoy a continuous supply of fresh okra throughout the growing season.
Selecting the Right Okra Variety
With numerous okra varieties available, each with its own unique characteristics, it’s important to consider factors such as growth habit, pod size, flavor, and disease resistance.
Firstly, consider the growth habit of the okra variety. Okra plants can be classified into two main types: bush and vining. Bush varieties are compact and well-suited for small gardens or containers. They have a more upright growth habit and tend to stay more compact, making them easier to manage and harvest. Vining varieties, on the other hand, have a more sprawling growth habit and may require trellising or support. These varieties are ideal for larger garden spaces and can offer higher yields.
Pod size is another important consideration. Okra pods can vary significantly in length, ranging from small and tender to large and robust. Consider the intended use of the okra when selecting a variety. If you prefer smaller pods for quicker cooking or pickling, look for varieties that produce smaller-sized pods. Conversely, if you enjoy larger pods for grilling or stewing, opt for varieties known for their larger pod size.
Flavor is another aspect to keep in mind. While okra generally has a mild, earthy flavor, some varieties may have subtle differences in taste. Seek out varieties that are described as having a flavor profile that appeals to your personal preferences. Some varieties may be sweeter or more tender, while others may have a slight tang or nutty undertones. Exploring different flavors can add variety and excitement to your culinary endeavors.
Additionally, consider disease resistance when selecting an okra variety. Some varieties have been bred to exhibit resistance to common diseases that can affect okra plants, such as fusarium wilt, root-knot nematodes, or bacterial leaf spot. Disease-resistant varieties can offer added protection and reduce the risk of plant loss or decline due to these common ailments. Check seed packets or catalogs for information on disease resistance when choosing your okra variety.
Finally, take into account your local climate and growing conditions. Some okra varieties perform better in specific regions or climates. Factors such as heat tolerance, days to maturity, and overall adaptability can influence the success of your okra plants. Research varieties that are known to thrive in your particular climate or seek advice from local gardening experts or extension services to ensure you choose a variety that is well-suited to your area.
Preparing the Soil and Planting Okra
Start by choosing well-drained soil with a pH level between 6.0 and 6.8. Okra prefers loose, loamy soil that allows for good root penetration and drainage. If your soil is heavy or clayey, consider amending it with organic matter, such as compost or well-rotted manure, to improve its structure and drainage capabilities.
Before planting, remove any weeds or grass from the planting area. Okra performs best in weed-free conditions, as competition for nutrients and water can hinder its growth. Clear the area thoroughly, either by hand or using a hoe or garden tool.
Next, incorporate the organic matter into the soil. Spread a layer of compost or well-rotted manure evenly over the planting area. Use a garden fork or tiller to work the organic matter into the soil, loosening it to a depth of around 8 to 10 inches (20 to 25 centimeters). This process improves soil fertility, moisture retention, and overall soil structure.
Once the soil is prepared, it’s time to plant the okra seeds. Okra can be directly sown into the garden once the soil has warmed up, typically after the last frost date. Dig small planting holes or furrows, approximately 1 inch (2.5 centimeters) deep and spaced about 12 to 18 inches (30 to 45 centimeters) apart. Place the seeds in the holes or furrows, spacing them about 3 to 4 inches (7.5 to 10 centimeters) apart.
Cover the seeds with soil, gently pressing it down to ensure good seed-to-soil contact. Water the planting area thoroughly, providing enough moisture to saturate the soil. Keep the soil consistently moist but not waterlogged throughout the germination and early growth stages.
As the okra plants emerge, thin them if necessary, leaving the strongest and healthiest seedlings. Proper spacing between plants is crucial to promote good air circulation and minimize the risk of diseases. For bush varieties, maintain a spacing of about 12 to 18 inches (30 to 45 centimeters) between plants. If you’re growing vining varieties, consider providing support or trellising to guide the plants as they grow.
Throughout the growing season, monitor soil moisture levels and provide regular watering, particularly during dry spells. Mulching around the base of the plants can help conserve moisture, suppress weeds, and maintain more consistent soil temperatures. Apply a layer of organic mulch, such as straw or wood chips, around the base of the plants, taking care not to pile it against the stems.

Caring for the Plants When Growing Okra
Once your okra plants are established, proper care and attention are essential for their optimal growth and productivity. Follow these guidelines to ensure your okra plants receive the care they need throughout the growing season.
Watering is a crucial aspect of caring for okra plants. They require regular watering, especially during dry spells or prolonged periods without rainfall. Aim to keep the soil consistently moist but not waterlogged. Check the soil moisture by inserting your finger about an inch (2.5 centimeters) into the soil. If it feels dry at that depth, it’s time to water. Deep, thorough watering is recommended, allowing the water to penetrate the root zone.
Mulching around the base of the plants can help conserve moisture, suppress weeds, and maintain more consistent soil temperatures. Apply a layer of organic mulch, such as straw or wood chips, around the base of the plants, taking care not to pile it against the stems. This will help retain soil moisture and reduce the need for frequent watering.
Okra plants benefit from regular feeding to support healthy growth and development. Before planting, incorporate organic matter into the soil to provide essential nutrients. Additionally, consider supplementing with a balanced, slow-release fertilizer or applying organic fertilizers, following the manufacturer’s instructions. Apply the fertilizer around the base of the plants, taking care not to directly contact the stems or leaves.
Maintaining good weed control is important for the health and productivity of okra plants. Weeds can compete with okra for nutrients, water, and sunlight, inhibiting their growth. Regularly inspect the planting area and remove any weeds that appear. Be cautious when weeding to avoid disturbing the shallow roots of the okra plants. Consider using mulch to suppress weed growth and make it easier to manage.
Providing support or trellising for vining varieties is essential to prevent sprawling and ensure proper growth. As the plants grow taller, gently guide them to the support structure and secure them if needed. This helps prevent breakage or damage to the plants and facilitates air circulation, reducing the risk of diseases.
Regularly monitor your okra plants for signs of pests or diseases. Common pests that may affect okra include aphids, flea beetles, and spider mites. Inspect the plants carefully and take appropriate measures, such as using organic pest control methods or insecticidal soaps, if necessary. Also, keep an eye out for any signs of diseases, such as fungal infections or leaf spots. Promptly address any issues to prevent further spread and minimize damage to the plants.
Harvesting and Storing Okra
Okra pods should be harvested when they are young and tender, typically when they reach 2 to 4 inches (5 to 10 centimeters) in length. It’s important to check your plants regularly and harvest the pods as soon as they reach the desired size. Leaving the pods on the plant for too long can result in tough, fibrous okra that is less enjoyable to eat.
When harvesting okra, use a sharp knife or pruners to cut the stem just below the pod. Avoid tearing or twisting the pods, as this can damage the plant. Harvesting with a clean cut helps minimize stress on the plant and encourages continued production throughout the growing season.
It’s important to note that okra pods can have prickly spines, so wearing gloves when harvesting can prevent any discomfort or skin irritation. Take care when handling the harvested pods, as they can be delicate and easily bruised. You can also buy spineless okra seeds.
After harvesting, it’s time to store the okra properly to maintain its freshness. Okra is best enjoyed when used soon after harvesting, but if you have more than you can use immediately, there are a few storage options.
For short-term storage, place the freshly harvested okra pods in a perforated plastic bag or wrap them in a damp paper towel. This helps maintain moisture and prevent the pods from drying out. Store the okra in the refrigerator crisper drawer, where the temperature is cool but not freezing. Properly stored, okra can stay fresh for up to 3 to 4 days.
To extend the storage life of okra, you can also consider blanching and freezing the pods. Blanching involves briefly immersing the okra in boiling water, then immediately transferring it to an ice bath to halt the cooking process. This helps preserve the flavor, texture, and color of the okra. Once blanched, pat the okra dry and place it in airtight freezer bags or containers. Label and date the packages and store them in the freezer. Properly frozen okra can last for 8 to 12 months.
When using frozen okra, it’s best to cook it directly from the frozen state without thawing. Thawing can cause the pods to become mushy. Frozen okra is particularly suitable for use in soups, stews, and stir-fries.
Creative Uses for Okra
Beyond its traditional culinary applications, okra offers a range of creative possibilities in the kitchen. Its unique texture and flavor make it a versatile ingredient that can be used in various dishes. Here are some creative uses for okra that can inspire your culinary explorations.
One popular way to utilize okra is by pickling it. Pickled okra makes a delightful addition to charcuterie boards, salads, or as a tangy accompaniment to sandwiches. The crispness of pickled okra adds a pleasant crunch and a burst of flavor that can elevate your dishes.
Okra can also be used in soups and stews to add thickness and texture. Its natural mucilage helps to thicken broths, resulting in a hearty and comforting dish. Incorporate okra into gumbo, a classic Louisiana stew, or add it to vegetable soups for a wholesome and satisfying meal.
Roasting okra is another creative way to enhance its flavor. Toss whole or sliced okra pods with olive oil, salt, and spices of your choice, then roast them in the oven until they turn crispy and golden. Roasted okra can be enjoyed as a standalone snack or used as a topping for salads, grain bowls, or pizzas, adding a delicious crunch and depth of flavor.
For a healthier alternative to fried okra, try oven-baked okra fries. Coat the sliced okra pods in a mixture of breadcrumbs, herbs, and spices, then bake them until crispy. The result is a guilt-free, flavorful snack or side dish that pairs well with a variety of dips, such as yogurt-based sauces or spicy aioli.
Okra can also be used to create unique condiments and spreads. Blend cooked okra with tahini, lemon juice, garlic, and olive oil to make a creamy okra hummus. This twist on traditional hummus offers a vibrant green color and a distinctive flavor that can be enjoyed with pita bread, fresh vegetables, or as a spread on sandwiches.
In addition to its culinary uses, okra has potential in other creative areas. Its fibrous stems can be used for crafting projects such as making natural rope or twine. Dried okra pods can be painted and used as decorative ornaments or strung together to create unique garlands.
Unique Recipes Using Okra
Spicy Okra Stir-Fry with Shrimp
Ingredients:
- 1 pound (450g) okra, sliced
- 1/2 pound (225g) medium-sized shrimp, peeled and deveined
- 2 tablespoons vegetable oil
- 1 onion, thinly sliced
- 3 cloves garlic, minced
- 1-inch piece of ginger, grated
- 1 red bell pepper, sliced
- 2 tablespoons soy sauce
- 1 tablespoon oyster sauce
- 1 tablespoon sriracha sauce (adjust to taste)
- Salt and pepper to taste
- Fresh cilantro for garnish
Instructions:
- Heat the vegetable oil in a large skillet or wok over medium-high heat.
- Add the sliced okra and stir-fry for 2-3 minutes until slightly tender. Remove from the skillet and set aside.
- In the same skillet, add the shrimp and cook until pink and opaque, about 2-3 minutes per side. Remove from the skillet and set aside.
- In the same skillet, add the sliced onion, minced garlic, and grated ginger. Sauté for 2 minutes until fragrant.
- Add the sliced red bell pepper and continue to stir-fry for an additional 2 minutes.
- Return the cooked okra and shrimp to the skillet.
- In a small bowl, whisk together the soy sauce, oyster sauce, and sriracha sauce. Pour the sauce over the okra and shrimp mixture.
- Stir-fry for another 2-3 minutes until everything is well-coated and heated through.
- Season with salt and pepper to taste.
- Serve the spicy okra stir-fry with shrimp over steamed rice or noodles.
- Garnish with fresh cilantro and enjoy!
Okra and Tomato Curry
Ingredients:
- 1 pound (450g) okra, trimmed and sliced
- 2 tablespoons vegetable oil
- 1 onion, finely chopped
- 2 cloves garlic, minced
- 1-inch piece of ginger, grated
- 2 tomatoes, diced
- 1 teaspoon ground cumin
- 1 teaspoon ground coriander
- 1/2 teaspoon turmeric powder
- 1/2 teaspoon chili powder (adjust to taste)
- 1 cup coconut milk
- Salt to taste
- Fresh cilantro for garnish
Instructions:
- Heat the vegetable oil in a large skillet or pan over medium heat.
- Add the chopped onion and sauté until softened and translucent, about 3-4 minutes.
- Stir in the minced garlic and grated ginger, cooking for an additional minute.
- Add the diced tomatoes and cook until they start to break down, about 5 minutes.
- Stir in the ground cumin, ground coriander, turmeric powder, and chili powder. Cook for 1 minute, stirring constantly to toast the spices.
- Add the sliced okra to the skillet and stir to coat it with the spice mixture.
- Pour in the coconut milk and bring the mixture to a simmer. Reduce the heat to low and cover the skillet.
- Let the curry simmer for about 15-20 minutes, or until the okra is tender and cooked through.
- Season with salt to taste.
- Garnish with fresh cilantro and serve the okra and tomato curry with steamed rice or naan bread.
Grilled Okra Skewers with Lemon-Herb Marinade
Ingredients:
- 1 pound (450g) okra, trimmed
- 2 tablespoons olive oil
- Zest and juice of 1 lemon
- 2 cloves garlic, minced
- 1 tablespoon chopped fresh herbs (such as parsley, basil, or thyme)
- Salt and pepper to taste
Instructions:
- Preheat the grill to medium-high heat.
- In a small bowl, whisk together the olive oil, lemon zest, lemon juice, minced garlic, and chopped fresh herbs.
- Thread the trimmed okra pods onto skewers, about 4-5 pods per skewer.
- Brush the okra skewers with the lemon-herb marinade, coating them evenly.
- Season with salt and pepper to taste.
- Place the skewers on the preheated grill and cook for 4-5 minutes per side, or until the okra is slightly charred and tender.
- Remove the skewers from the grill and serve immediately as a side dish or appetizer.
Okra Fritters with Spicy Yogurt Dip
Ingredients:
- 1 pound (450g) okra, trimmed and finely chopped
- 1 cup chickpea flour
- 1/2 cup cornmeal
- 1 teaspoon baking powder
- 1 teaspoon ground cumin
- 1/2 teaspoon chili powder (adjust to taste)
- 1/2 teaspoon salt
- 1/4 teaspoon black pepper
- 1/2 cup water (approx.)
- Vegetable oil for frying
For the Spicy Yogurt Dip:
- 1 cup Greek yogurt
- 1 tablespoon lemon juice
- 1 teaspoon ground cumin
- 1/2 teaspoon chili powder
- Salt and pepper to taste
Instructions:
- In a large mixing bowl, combine the chopped okra, chickpea flour, cornmeal, baking powder, ground cumin, chili powder, salt, and black pepper.
- Gradually add water to the mixture, stirring until you achieve a thick batter consistency. The amount of water needed may vary.
- In a deep skillet or frying pan, heat vegetable oil over medium-high heat.
- Drop spoonfuls of the okra batter into the hot oil, forming fritters. Cook them in batches, taking care not to overcrowd the pan.
- Fry the fritters for 2-3 minutes on each side until they turn golden brown and crisp.
- Once cooked, transfer the fritters to a paper towel-lined plate to drain excess oil.
- For the spicy yogurt dip, whisk together the Greek yogurt, lemon juice, ground cumin, chili powder, salt, and pepper in a small bowl until well combined.
- Serve the okra fritters warm with the spicy yogurt dip on the side as a delightful appetizer or snack. Enjoy!
Note: Feel free to adjust the seasonings and spice levels in these recipes according to your taste preferences.
Conclusion to Growing Okra
Growing okra can be a rewarding experience for gardeners and vegetable enthusiasts alike. We have explored the various aspects of growing okra, from selecting the right variety to caring for the plants and harvesting the pods. Okra’s ability to thrive in warm climates, its versatility in culinary applications, and its rich nutritional profile make it a valuable addition to any garden.
By following the guidelines for soil preparation, planting, and caring for okra plants, you can ensure a successful harvest. Whether you choose to enjoy okra in traditional dishes such as stews and stir-fries or explore its creative uses in pickling, roasting, or even crafting, this vegetable offers a world of possibilities.
Remember to harvest okra at the right stage of maturity for the best taste and texture, and consider storing the excess crop through proper refrigeration or freezing techniques. By embracing the process of growing okra and experimenting with its culinary potential, you can savor the flavors and reap the benefits of this versatile vegetable from your very own garden.
Be sure and check out our list of articles for more great info on sustainable living, as well as edible and medicinal plants.
FAQs:
Q: What is the secret to growing okra?
A: The secret to growing okra lies in providing it with the right growing conditions. Okra thrives in warm climates, so make sure to plant it in a location with full sun exposure. Additionally, ensure that the soil is well-draining and rich in organic matter. Regular watering, adequate spacing between plants, and proper fertilization will contribute to successful okra growth.
Q: How long does it take to harvest when growing okra?
A: Okra plants typically take around 50 to 65 days from planting to harvest. However, the exact time may vary depending on the variety, growing conditions, and climate. It is important to monitor the plants regularly and harvest the pods at the right stage of maturity for optimal taste and texture.
Q: What is the best month to plant okra?
A: Okra thrives in warm temperatures, so it is best to plant it after the danger of frost has passed and the soil has warmed up. In most regions, this corresponds to springtime, typically around late April or May. Check the local climate and temperature trends to determine the ideal planting time for your specific location.
Q: Why is okra hard to grow?
A: Okra can sometimes be challenging to grow due to its specific requirements and potential susceptibility to pests and diseases. It prefers warm climates and requires consistent moisture and well-drained soil. Additionally, okra can be prone to pests like aphids or beetles, and diseases like powdery mildew. Proper care, such as regular watering, pest control measures, and good soil preparation, can help overcome these challenges.
Q: What to do with okra after picking it?
A: After picking okra, it is important to handle it with care to maintain its quality. Store freshly picked okra in a breathable bag or container in the refrigerator. Okra is best when used within a few days, as it tends to deteriorate quickly. Alternatively, you can blanch and freeze okra for longer-term storage.
Q: How many times can you harvest when growing okra?
A: Okra plants are known for their continuous production throughout the growing season. You can harvest okra pods multiple times during the season, typically every 2 to 3 days. Regularly harvesting the pods promotes new growth and encourages the plant to keep producing throughout the season.
Q: How big should okra be before you pick it?
A: Okra pods should be harvested when they are young and tender, typically around 2 to 4 inches in length. It is important to pick the pods before they become tough and fibrous. Check the pods regularly, as they can grow rapidly, especially in warm weather conditions.
Q: What does ripe okra look like?
A: Okra is typically harvested when the pods are immature, as they become tough and less desirable when fully ripe. Ripe okra pods are usually larger, tougher, and darker in color. They may also have a woody texture and hard seeds. It is recommended to harvest okra when the pods are still young and tender for the best eating experience.
Q: What is the best cooking technique for okra?
A: Okra can be cooked using various techniques, including sautéing, stir-frying, grilling, or roasting. Each method brings out different flavors and textures. Choose the cooking technique that suits your preferences and the recipe you are preparing. Keep in mind that quick cooking methods help retain okra’s natural crunchiness.
Q: How do you cook okra so it’s not slimy?
A: The sliminess often associated with okra can be minimized by using certain cooking techniques. Slicing the okra and cooking it at high heat, such as sautéing or stir-frying, helps reduce the slimy texture. Acidic ingredients like lemon juice or vinegar can also help reduce the sliminess. Additionally, fully drying the okra before cooking and avoiding overcooking can contribute to a less slimy result.
Q: What is the healthiest way to eat okra?
A: Okra is a nutritious vegetable that offers various health benefits. To retain its nutritional value, it is best to consume okra through cooking methods that preserve its nutrients. Lightly cooking or steaming okra helps retain its vitamins, minerals, and antioxidants. Adding it to soups, stews, or salads can also provide a healthy and flavorful option.
Q: How do you cut okra before cooking?
A: Before cooking, it is recommended to trim the stem end of the okra pods and discard it. You can then slice the okra into desired shapes, such as rounds or halves, depending on your recipe. Ensure the okra is dry before cutting to minimize sliminess.
Q: Are there different types of okra plants?
A: Yes, there are several varieties of okra plants available, each with its own unique characteristics. Common okra varieties include Clemson Spineless, Emerald, Louisiana Green Velvet, and Red Burgundy. These varieties may differ in pod color, size, shape, and growth habits. Consider selecting a variety that suits your preferences and growing conditions.
Q: What is okra that grows on a vine?
A: Okra that grows on a vine refers to a specific type called “Climbing Okra” or “Vining Okra.” Unlike the traditional bush-type okra plants, these varieties have a climbing habit and require support, such as trellises or stakes, to grow vertically. Climbing okra plants can be an interesting choice for gardeners with limited space or those looking for a unique gardening experience.